SAS Thread - multiexposures - XMM-Newton
Overlapping EPIC data treatment: (multixmmselect)
|
Introduction This thread illustrates the treatment of overlapping EPIC data from any combination of different observations and exposures to obtain individual light curve and spectral products in one simple step. It also allows to obtain combined spectral products. Expected Outcome Light curves for all the single input exposures. Spectral files and response matrices for all the single input exposures, and eventually their combination into a single spectrum and single combined response matrix. SAS Tasks to be Used The main task used by this thread is multixmmselect, which makes use of multiespecget and eventually epicspeccombine. Prerequisites Useful Links Last Reviewed: 25 MAY 2023, for SAS v21.0Last Updated: 25 MAY 2023 |
Procedure
Several fields have been repeatedly observed by XMM-Newton with a certain level of overlapping. The combination of the data in such fields is desirable, either to obtain a larger signal to noise ratio for a given source, or to check for variability.
In this thread we explain the expansion of certain tasks (xmmselect and especget), adapted to work with several exposures at once, making the work to be performed in the case of overlapping fields easier.
multixmmselect starts a graphical interface which allows the user to work with several event files from different input exposures simultaneously. These exposures can be from the same or different observations. The task multixmmselect is an extension of xmmselect for working with a single input exposure. Since it handles at the same time event files from EPIC MOS and pn, as opposed to the xmmselect task, it only includes a subset of filtering parameters. multixmmselect offers the possibility to obtain single exposure light curves, combined images and single or combined spectra in one single easy step. A key feature of multixmmselect is the ability to extract spectra by selecting a common extraction region to all the single exposures at once. This is done through multiespecget, a modified version of especget for single exposures. Even further, it is possible to get a combined spectra and matrices including all the individual exposures by making use of the task epicspeccombine.
All of the above functionality can be accessed from the multixmmselect graphical user interface. In this thread we will assume for simplicity that we are dealing with three exposures from a single observation.
- Set up your SAS environment (follow the SAS Startup Thread).
- Create PN and MOS event files for your observation(s), if necessary, cleaned and filtered for particle background (see the How to filter EPIC event lists for flaring particle background Thread).
- Start multixmmselect in its graphical form,
multixmmselect -d &
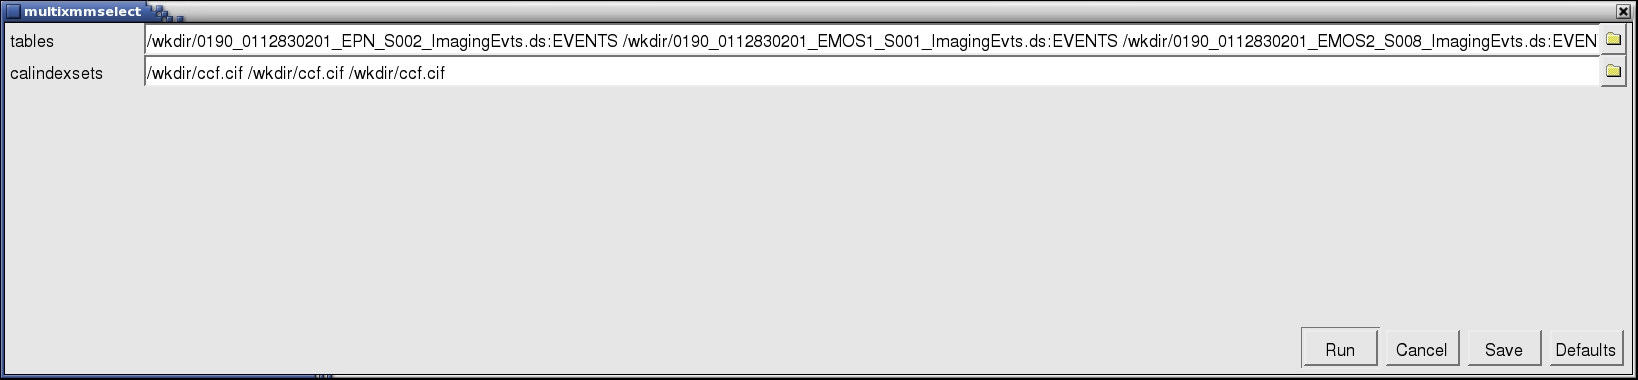
A window will pop up, as shown in Fig.1.

Fig.1: The GUI window for multixmmselect. - Locate the different event files and corresponding Calibration Index File or CIF files. You can use the browser yellow symbols in the GUI to navigate through your folders and select the files. Notice that each input event list has to have a corresponding calindexset file specified, even if it is the same, as it is the case in the example shown in the Fig.1. It is important to use full path names if the different event files from the different exposures are located in different directories.
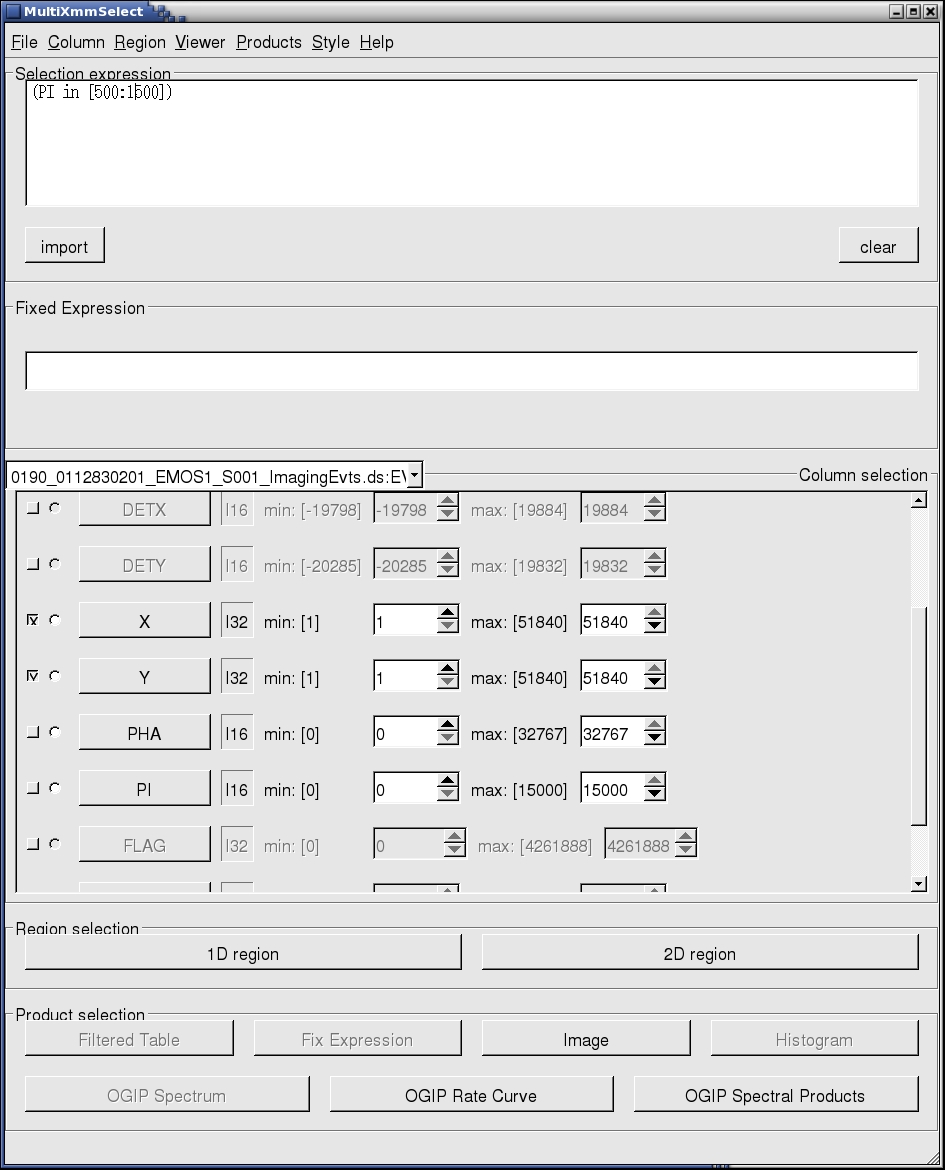
- By pressing Run, the main multixmmselect window will pop up, as shown in Fig.2:
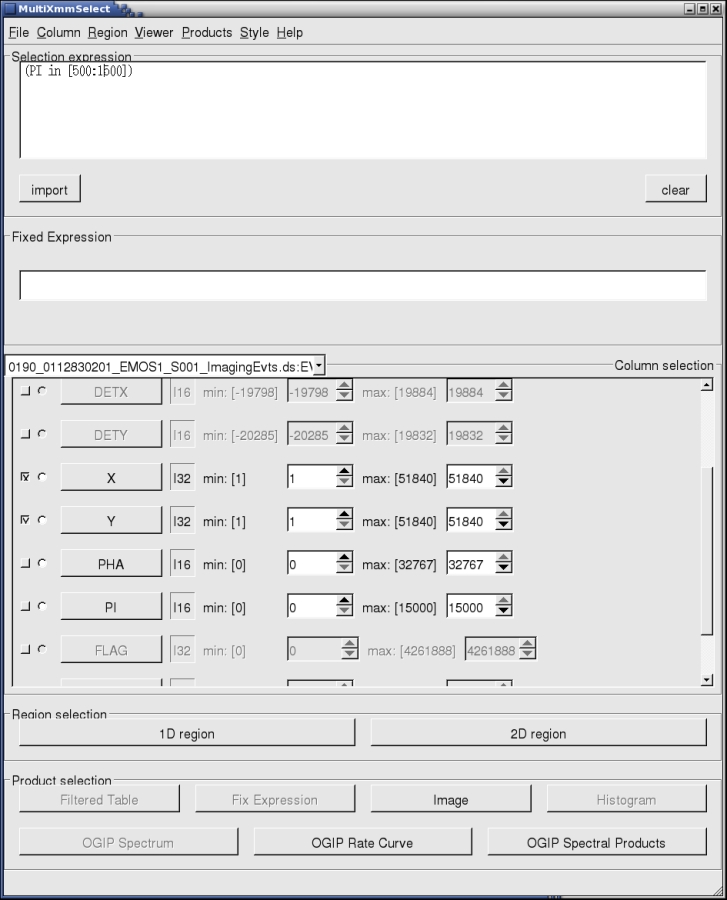
Fig.2: The main multixmmselect window.We assume here that the user is already familiar with this type of window interface from working with the threads How to extract MOS spectra of a point-like source and associated matrices using the SAS GUI, and the corresponding one for pn, How to extract PN spectra of a point-like source and associated matrices using the SAS GUI.
In Fig.2, we see how some of the event file variables are disabled. As mentioned above, this is because although the variables do exist in the individual event files, they can have different meanings for MOS or pn event files. Since multixmmselect deals with all the exposures simultaneously, those variables lose their meaning. However, we still have access to a certain level of filtering, and more importantly, to the region selection filtering which can be obtained from XMMGRACE, to filter periods of time selected from the light curve, and ds9, to filter spatial regions from the image.
- For example, to identify the product spatial extraction regions (source and background regions), an image has to be produced by selecting X and Y in the Column selection area of the multixmmselect GUI. Once selected, produce the combined image by pressing Image in the Product selection area of the multixmmselect GUI. An image like that in Fig.3 will appear on a ds9 window.

Fig.3: A combined image including all the different input exposures.Using the ds9 window, we can select source and background regions for all exposures at once (as shown in Fig.3) and pass both selection regions back to the multixmmselect main window by pression the 2D Region button in the Region selection area of the multixmmselect GUI. Should one of the exposures not cover the selected regions with an active CCD area, the task will issue an error message. It should be ensured that both source and background regions for each one of the exposures used covers an active area on a CCD.
- Now, the OGIP Spectral Products button in the Product selection area of the multixmmselect GUI can be used for starting spectral extraction. This is done through multiespecget, an extension of especget for running over multiple exposures. The GUI for multiespecget will pop up as shown in Fig.4.
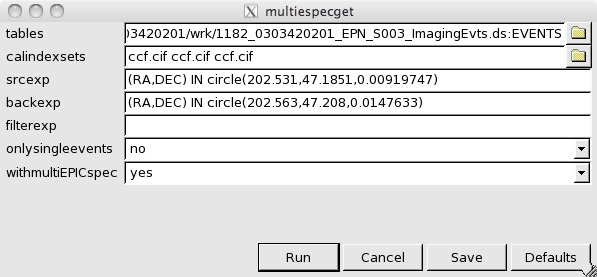
Fig.4: multiespecget graphical interfaceWe can see in the GUI the different input event lists with the corresponding calindex files, the expressions for source and background extraction and a filter expression. Make sure that the srcexp and backexp contain your source and background expressions, and that filterexp only contains event selection expressions and not any region selection expression. If this is the case, delete any region selection expression from filterexp. We can also see two options for the output products, one for single / double events selection, and the other for obtaining, on top of a single spectrum and response matrix per input exposure, a combined spectrum and matrix. Details of this combination are given in the thread, Combining the spectra of the 3 EPIC cameras. Once ready, simply press Run and all the spectral products will be produced.
- The OGIP Rate Curve in the Product selection area can also be used to extract a light curve for all the individual exposures at once. In this case, we would need a single spatial region from which to extract the light curve. Again an image has to be produced by selecting X and Y in the Column selection area of the GUI. Once the ds9 window pops up, we make a 2D selection region and pass it back to the multixmmselect main window by pressing the 2D Region button in the Region selection area of the multixmmselect GUI. Notice that a light curve for the source and a light curve for the background would have to be produced in separate steps.
Light curves for can also be used to filter periods of flaring activity as described in the How to filter EPIC event lists for flaring particle background Thread for single observations. However keep in mind that if the different exposures used within multixmmselect are separated by long periods of time, the XMMGRACE window showing the light curves will not remove the empty gaps between the different exposures, so trying to filter all the light curves in one go can become cumbersome. It might be desirable, as indicated in Step 2 of this thread, to filter first the different exposures individually before loading them into multixmmselect.
|
When selecting extraction regions to derive the spectral products, it should be ensured that both source and background regions for each one of the exposures used covers an active area on a CCD, otherwise an error will be issued. |